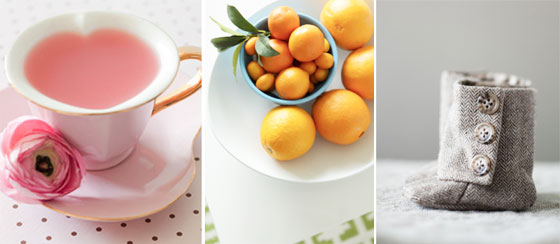
 A great product image is essential if you want to sell your goodies online. But we can’t all afford to have professional photos taken, and manufacturers’ photos can be a bit, well… dull, can’t they.
Take heart – you can DIY and create your own quality, hi resolution images! This is especially handy if you add to your collections continually.
Camera
This post is about taking decent photos with a decent smartphone. A real digital camera is better, but a good one costs a bit. You can use your smartphone camera with good effect if it’s over 8 megapixels.
Accessories
Smartphone SLR-style apps can give you greater flexibility so you can take better photos. However, don’t use a really creative photography app for product images. They’re great fun for blogs or editorial, but they won’t do you any favours when your web visitors are trying to decide whether or not to buy your goods.
Invest in a simple camera mount to avoid shaky images, and consider buying two good removable lenses (yes you can get them for smartphones!). A separate zoom lens will give you better-detailed product shots than a ‘digital’ (in camera) zoom, and a wide-angle lens is best when including backgrounds.
Photo background
Talking of backgrounds, you’ll need at least two types for your product photos – a sharp, high quality close up and a more creative and editorial version.
For a standard ‘studio’ product shot, use a solid, plain background, like large sheet of white paper. There’s good illustration of how to set this up in brokenarts’s blog.
For a more creative shot, place your product in context, like the kitchen or illustrating its uses, and shoot the whole thing.
Lighting
For natural lighting, choose a well-lit spot without direct sunlight. Turn off any room lights and use a mirror or white boards to reflect some daylight onto your product.
For a studio effect, make a backdrop of a plain piece of white paper as described above. Turn off the overhead lights and use regular lamps either side of the object to provide ‘spotlighting’. You will need to move them around to get the best lighting effect and avoid dark areas on the product or shadows on the paper.
Whatever lighting you use, make you capture the right colour of the product in your photos.
Image editing
We live in the heady days of cloud software, and free photo-editing tools are available to help you tweak your photos manually. The design industry standard is Photoshop, but it’s rather expensive. I use pixlr, but I’ll cover a few other free image optimisation tools in a future post.
Whatever software you choose, keep your editing simple and don’t alter the colour of your product. You also don’t need to re-size your images as Spiffy Stores automatically re-sizes them to fit in different areas of your store.
Have fun experimenting with photography on your smartphone!

 Jamie Oliver was on to something when he created nutritious meals that busy families could make in 30 minutes (although it always takes me a bit longer). It was a breakthrough in weeknight cooking and stores sold millions of his cookbooks to hungry, time-poor cooks worldwide.
 Here’s a before and after from my own holiday snaps.