Using Dreamweaver to edit your store theme
From Spiffy Stores Knowledge Base
Adobe Dreamweaver (formerly Macromedia Dreamweaver) is a proprietary web development application originally created by Macromedia. It is now developed by Adobe Systems, which acquired Macromedia in 2005.
Dreamweaver is available for both Mac and Windows operating systems. A free trial can be downloaded from the Adobe site at http://www.adobe.com/products/dreamweaver/
Setting up Dreamweaver to access your files
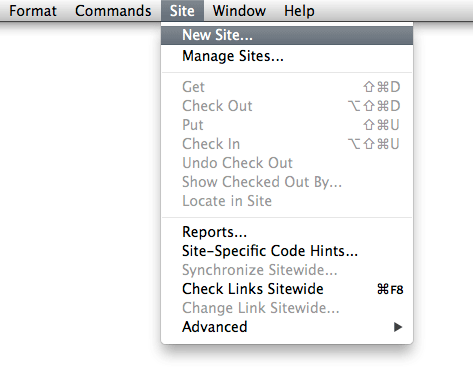
From the top menu in Dreamweaver, go to "Site -> New Site..."
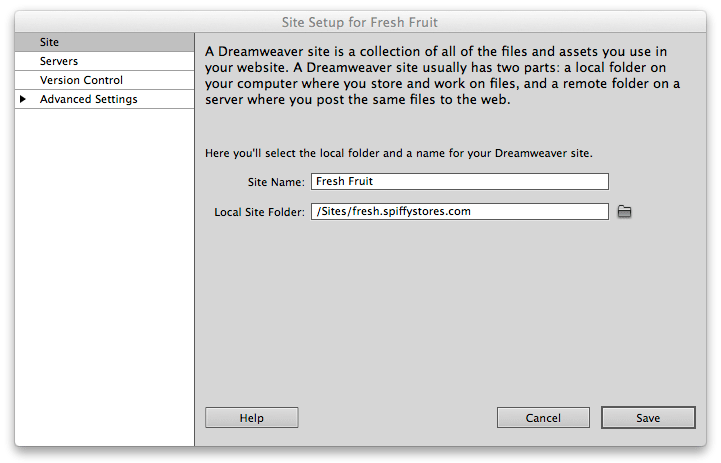
A dialog box will open, where you need to name your site, and set the location of where you would like to store your theme files on your computer.
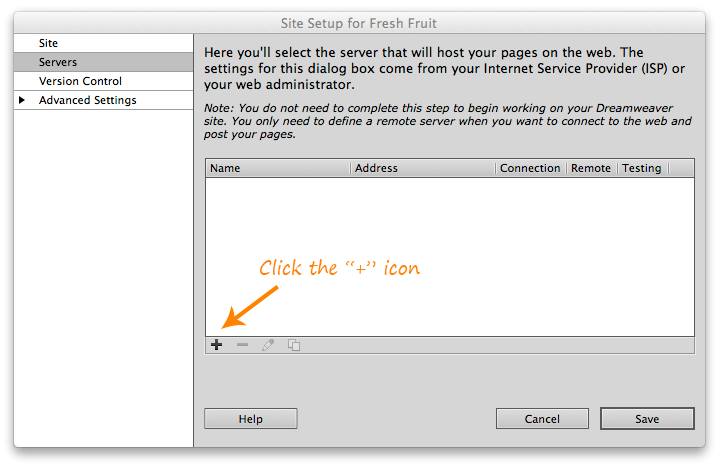
When you've done this, click on the "Servers" section on the right, and then click the Plus Button to set up access to your theme files on the server
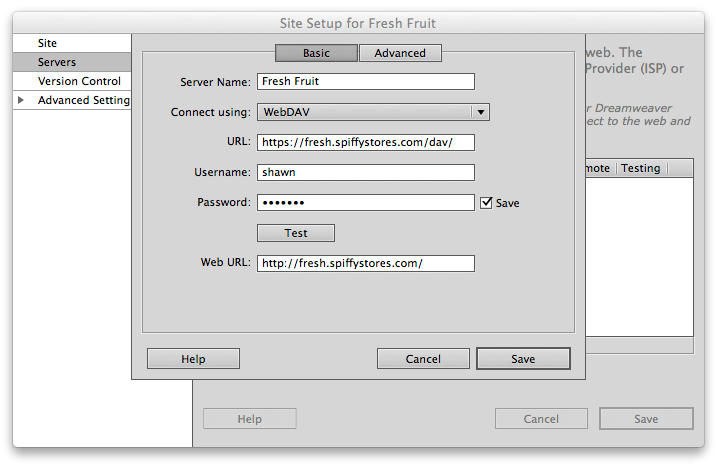
- In the Server name field, you can enter anything,. This is for your reference only.
- For "Connect Using", select "WebDav".
- In the URL field, you must enter the address of your store (followed by "/dav/" in the following format. Note: You must specify https to ensure that you are using a secure session.
https://yourstorename.spiffystores.com/dav/
- Enter your username and password. Use your email address and the password that you use to log on to your Spiffy Store toolbox.
- In the Web URL field, enter the address of your store (http not https) For example
http://fresh.spiffystores.com/
- Test the connection, and if successful, click save. If not, check your settings.
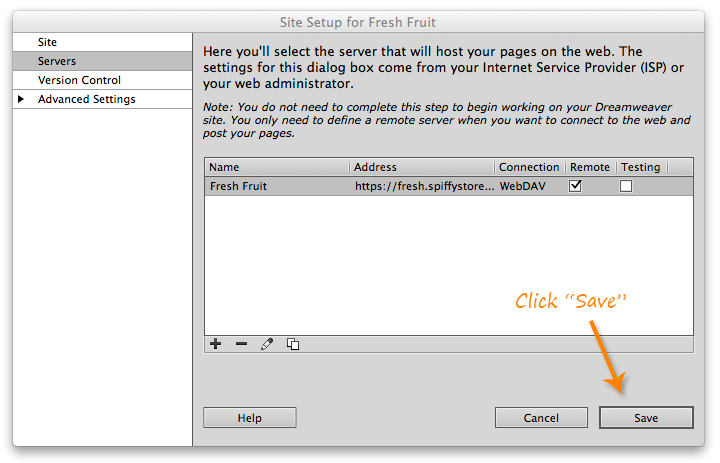
You should now be back on the Site Setup main screen. Click save to save your settings.
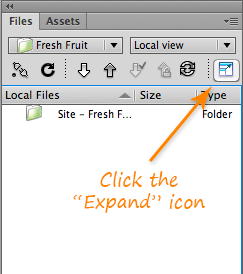
You now need to connect to your site and download your themne files. To do this, you should expand out the "Files" tab into a files window. You do this by clicking the small "Expand" icon in the "Files" panel.
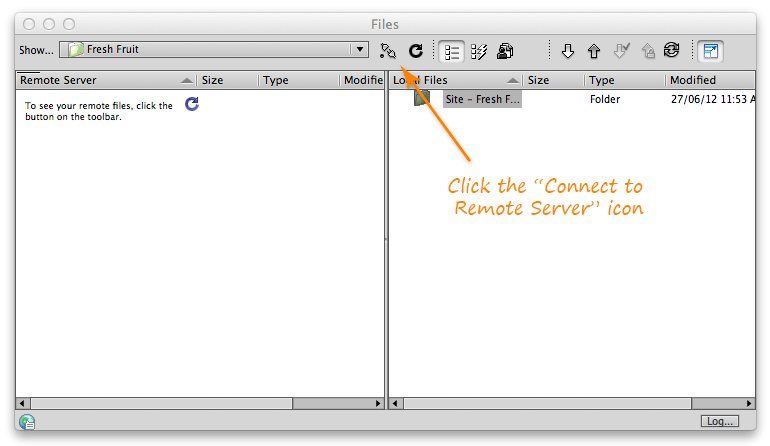
Now you should see a window displaying the server on one side, and your local files on the other. Click the "Connect to server" icon to see the files and folders on the server.
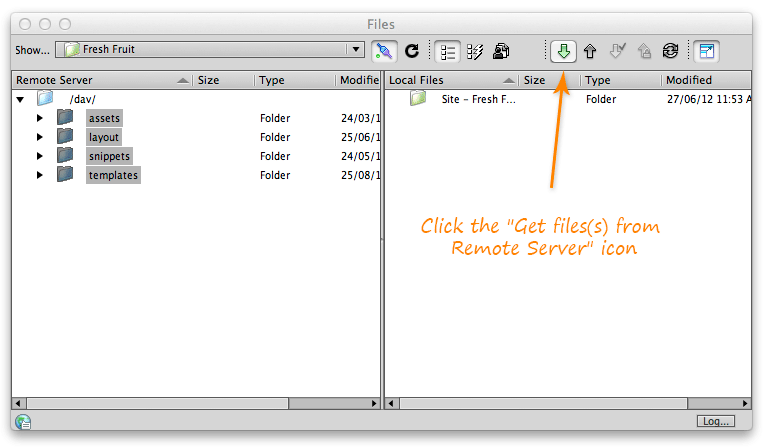
Download your files by highlighting all of the files on the remote server, and clicking the "Get files(s) from Remote Server" icon. The files should take a couple of minutes to download, as Dreamweaver is a little slow doing this.
You can now open your files in Dreamweaver, make your edits, and then upload them to the server. For information about getting code highlighting working in Dreamweaver, please follow the instructions below.
Setting up code highlighting and "Design View" in Dreamweaver
Dreamweaver can view and edit the template files, but to be able to see the files in "Design view" in Dreamweaver, you need to add ".liquid" files to the list of files in the "html" section of the MMDocumentTypes.xml file.
There is a tech note on the Adobe site about how to do this at http://kb2.adobe.com/cps/164/tn_16410.html
After you have done this, you download your theme, unzip it, and open one of the files. It should display just like a normal HTML file.
Liquid tags are special tags that are used in normal HTML. All of the the templates that make up your theme are just HTML with Liquid tags in them, so you should be able to edit any of the template files in any HTML editor.
The theme.liquid file contains all of the layout information, and the other liquid files in the "templates folder make up each of the different types of pages in your site, such as...
- index.liquid (home page)
- collection.liquid (collection pages)
- product.liquid (product pages)
- cart.liquid (shopping cart page)
- page.liquid (normal pages)
- blog.liquid (your main blog page)
About WebDAV
WebDAV (World Wide Web Distributed Authoring and Versioning) is a standard for collaborative authoring on the Web. It is a set of extensions to the Hypertext Transfer Protocol (HTTP) that allows for collaborative editing and file management between users via the Internet.
For more information, check out the Wikipedia article at https://en.wikipedia.org/wiki/WebDAV
