How to set up your email program to access your Spiffy Stores mailboxes
From Spiffy Stores Knowledge Base
Contents
Basic Settings
Note: In these instructions, yourstore refers to the name given to your Spiffy Store, and this is the name that appears in your spiffystores.com domain name. For example, if your store is called sellmore, then your Spiffy Stores domain name will be sellmore.spiffystores.com.
| Incoming POP3 Server: | mail.yourstore.spiffystores.com |
| Outgoing (SMTP) Server: | mail.yourstore.spiffystores.com |
| Username: | Your FULL email address that you are using (e.g. info@yourstore.spiffystores.com) |
| Password: | The password that you requested us to set up when requesting the mailbox. |
IMPORTANT: In your email application, please make sure you click the box which reads "My server requires authentication", or you will not be able to send mail through the server.
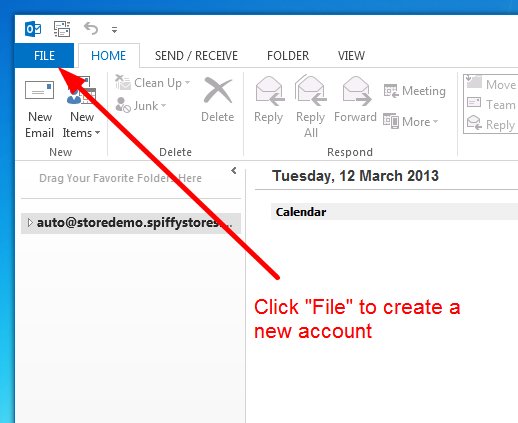
Setting Up Microsoft Outlook
To read your email messages using Microsoft Outlook, you will need to configure several Microsoft Outlook email service options. Please note that there are different versions of Outlook, so sometimes the names of menu items or fields are a little different from our instructions here.
To set up Microsoft Outlook:
- Open Microsoft Outlook
- Select "Tools >> E-mail Accounts" from the menu
- Choose "Add a new e-mail account", and click Next
- For your server type, select "POP3" and click Next
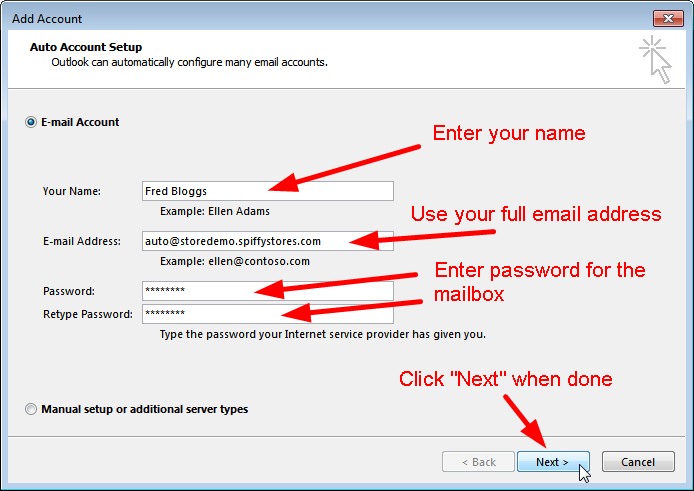
- On the Internet E-mail Settings (POP3) window, enter your information as follows:
Your Name: Enter your first and last name. E-mail Address: Enter your e-mail address. User Name: Enter your e-mail address, again. Password: Enter the password you set up for your e-mail account. Incoming mail server (POP3): Enter mail.yourstore.spiffystores.com Outgoing mail server (SMTP): Enter mail.yourstore.spiffystores.com 
- Click "More Settings."
- On the Internet E-mail Settings window, select the "Outgoing Server" tab.
- Select "My outgoing server (SMTP) requires authentication."
- Select "Use same settings as my incoming mail server".
- Select the "Advanced" tab and change the "Outgoing server (SMTP)" port to 2525.
- Click OK.
- You should now be page on the "Email Accounts" window, so Click Next, and "Finish" to save your settings.


If you would like to also use your webmail to read messages, or also use another computer, follow the instructions below;
13. Go To the Advanced tab.
14. Tick "Leave a copy of messages on the server" and change the removal setting to "Remove from server after 14 days" and tick "Remove from server when deleted from deleted items"
15. Click OK again to return to the "Email Accounts" window, click "Next", and "Finish" to save your settings.
Setting Up Your E-mail in Mozilla Thunderbird
This tutorial will help you set up the Mozilla Thunderbird e-mail client to work with your e-mail account.
To Set Up Your E-mail Account in Mozilla Thunderbird
- In Mozilla Thunderbird, select Tools > Account Settings.
- Select "Email account " and click Next.
- Enter your name and e-mail address.
- Select "POP" as the type of incoming server you are using.
- Your incoming server is mail.yourdomainname.com
- Click Next.
- Enter your full e-mail address for the "Incoming User Name," and "Outgoing User Name."
- Click Next.
- Enter a name for your e-mail account and click Next.
- Verify your account information and click Finish.
- In the Account Settings window, select "Outgoing Server" listed below your new account.
- Enter mail.yourdomainname.com for the "Server Name" and change the "Port" setting to 2525.
- Select "Use name and password" and enter your e-mail address. Thunderbird will ask you for your password the first time you try to send mail. Click OK.
Setting Up Your E-mail in MS Outlook Express
This tutorial shows you how to set up Microsoft Outlook Express 6 to work with your e-mail account. This tutorial focuses on setting up Microsoft Outlook Express 6, but these settings are similar in other versions of Microsoft Outlook Express. You can set up previous versions of Microsoft Outlook Express by using the settings in this tutorial.
To Set Up Your E-mail Account in Microsoft Outlook Express
1. In Microsoft Outlook Express, from the Tools menu, select Accounts.
2. Go to the Mail tab and from the Add menu, select Mail.
3. In the Display Name field, enter you full name and click Next.
4. In the E-mail address field, enter your email address and click Next.
5. On the E-mail Server Names page, enter your information as follows:
| My incoming mail server is a: | POP3. |
| Incoming mail (POP3, IMAP or HTTP) server: | mail.yourdomainname.com |
| Outgoing mail (SMTP) server: | mail.yourdomainname.com |
6. Click Next.
7. In the Account Name and Password fields, enter your full email address and password, and then click Next .
8. On the setup confirmaiton page, click Finish.
9. On the Mail tab, select the account you just created and then click Properties.
10. Go to the Servers tab.
11. Select My server requires authentication, and then click Apply.
12. Go to the Advanced tab.
13. In the Server Port Numbers section, change Outgoing mail (SMTP) to 2525, and then click OK.
14. (Optional) If you would like to keep a copy of your email messages stored on your email provider's servers, in the Delivery section, select Leave a copy of messages on server.
15. Your Outlook Express account is now set up.
16. Click Close to close the Internet Accounts window and return to your Outlook Express.