Difference between revisions of "Simple Theme - Creating banner images on collection pages"
From Spiffy Stores Knowledge Base
| Line 1: | Line 1: | ||
The Simple Theme allows you to have individual banner images on every collection, product, page, blog, and blog article. The process to add these in is very straightforward, and is unique to this theme. This tutorial will not work in other themes. | The Simple Theme allows you to have individual banner images on every collection, product, page, blog, and blog article. The process to add these in is very straightforward, and is unique to this theme. This tutorial will not work in other themes. | ||
| − | ==Creating your image== | + | ==Step 1 - Creating your image== |
All banner images are restricted to be the same height and width as you have set the slideshow on your home page. If you have modified the size of the slideshow on your home page, you will need to ensure that your image sizes match those of your home page for consistent display. | All banner images are restricted to be the same height and width as you have set the slideshow on your home page. If you have modified the size of the slideshow on your home page, you will need to ensure that your image sizes match those of your home page for consistent display. | ||
| Line 23: | Line 23: | ||
#Click "Create a new image" | #Click "Create a new image" | ||
#Set the size recommended above, and click OK | #Set the size recommended above, and click OK | ||
| − | #You now have your canvas to work within. You will need to explore the various tools and options. You can open your own images in Pixlr using "File -> Open image" in the Pixlr menu. | + | #You now have your canvas to work within. You will need to explore the various tools and options. You can open your own images in Pixlr using "File -> Open image" in the Pixlr menu. If you paste in any images, you'll need to make sure when you're doing this that you don't stretch your images. You can do this by holding down the shift key when re-sizing. |
| − | #When your | + | #When your image is looking gorgeous, save it by choosing "File -> Save" from the Pixlr top menu. |
#Choose JPEG for your format, and set your quality to 80 | #Choose JPEG for your format, and set your quality to 80 | ||
#When you've saved the file to your computer, upload it by following the instructions below. | #When you've saved the file to your computer, upload it by following the instructions below. | ||
| + | |||
| + | |||
| + | ==Step 2 - Uploading your image== | ||
| + | |||
| + | ==Step 2 - Add the image to your page== | ||
| + | The process to add these in is very straightforward, and is unique to this theme. Simply edit the collection, and add the following code anywhere in the collection description field... | ||
| + | |||
| + | <pre><!--banner="your-banner-filename.jpg"--></pre> | ||
Revision as of 14:23, 15 June 2020
The Simple Theme allows you to have individual banner images on every collection, product, page, blog, and blog article. The process to add these in is very straightforward, and is unique to this theme. This tutorial will not work in other themes.
Contents
Step 1 - Creating your image
All banner images are restricted to be the same height and width as you have set the slideshow on your home page. If you have modified the size of the slideshow on your home page, you will need to ensure that your image sizes match those of your home page for consistent display.
The banner images are all in landscape format, but if you have parallax enabled the best format to use is square images. If you use a portrait image, you'll be slowing down your site for an image that will likely look awful.
If widescreen slideshow is enabled...
- Create your banner image at 2048px x 2048px. This is so the banner can scale on all devices.
- Give your banner image a descriptive name, so you'll know what it is later on.
If widescreen slideshow is not enabled...
- Create your banner image at 1200px x 550px. As widescreen is not enabled, the size will dynamically shrink to fit all devices.
- Give your banner image a descriptive name, so you'll know what it is later on
Using Pixlr to create a banner image
Pixlr is a free online image editing program, where you can edit your images in your web browser.
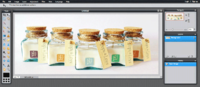
Pixlr editor

- Go to the Pixlr editor
- Click "Create a new image"
- Set the size recommended above, and click OK
- You now have your canvas to work within. You will need to explore the various tools and options. You can open your own images in Pixlr using "File -> Open image" in the Pixlr menu. If you paste in any images, you'll need to make sure when you're doing this that you don't stretch your images. You can do this by holding down the shift key when re-sizing.
- When your image is looking gorgeous, save it by choosing "File -> Save" from the Pixlr top menu.
- Choose JPEG for your format, and set your quality to 80
- When you've saved the file to your computer, upload it by following the instructions below.
Step 2 - Uploading your image
Step 2 - Add the image to your page
The process to add these in is very straightforward, and is unique to this theme. Simply edit the collection, and add the following code anywhere in the collection description field...
<!--banner="your-banner-filename.jpg"-->