How to Configure Microsoft Windows Live Mail
From Spiffy Stores Knowledge Base
Revision as of 11:10, 14 March 2019 by Shawn (talk | contribs) (→Setting Up Microsoft Windows Live Mail)
Revision as of 11:10, 14 March 2019 by Shawn (talk | contribs) (→Setting Up Microsoft Windows Live Mail)
Setting Up Microsoft Windows Live Mail
This tutorial shows you how to set up Microsoft Windows Live Mail to work with your email account.
For other email software, refer to How to set up your email program to access your Spiffy Stores mailboxes
Note: In these instructions, yourstore refers to the name given to your Spiffy Store, and this is the name that appears in your spiffystores.com domain name. For example, if your store is called sellmore, then your Spiffy Stores domain name will be sellmore.spiffystores.com.
To set up Windows Live Mail:
- Open Windows Live Mail.
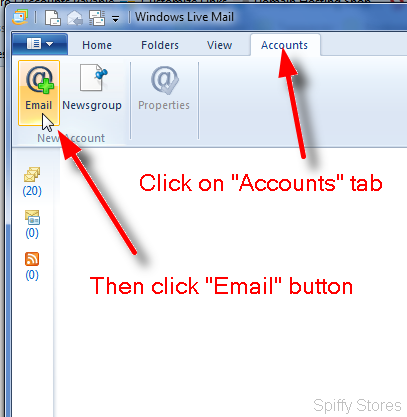
- Click on the "Accounts" tab, then click on the "Email" button.
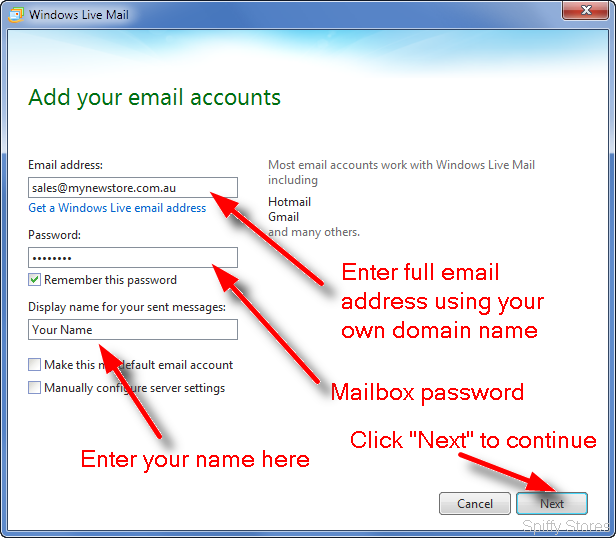
- On the "Add your email accounts" window
- In the "Email address" field, enter your email address.
Your email address should be something like "name@yourstore.spiffystores.com", and is displayed as your "User Name" in the Preferences > Email accounts section of your store's admin area.. - In the "Password" field, enter your mailbox password.
- In the "Display name" field, enter your full name.
- Click "Next" to continue.
- In the "Email address" field, enter your email address.
- On the "Configure server settings" page, enter your information as follows:
Incoming server information Server type: POP Server address: mail.spiffystores.com Port: 995 Requires a secure connection (SSL): Ticked Authenticate using: Clear text Logon user name: Enter your full Spiffy Stores email address as it appears in your Spiffy Stores Toolbox on the "Preferences >> Email Accounts" page, e.g. "joe@joeswidgets.spiffystores.com" Outgoing server information Server address: mail.spiffystores.com Port: 465 Requires a secure connection (SSL): Ticked Requires authentication: Ticked 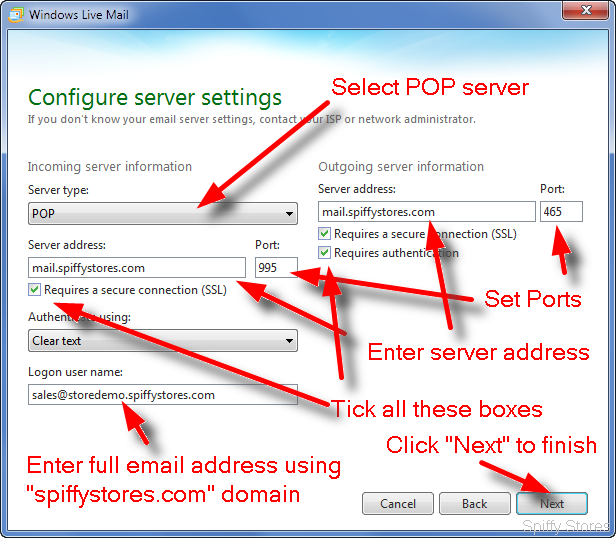
- Click "Next".
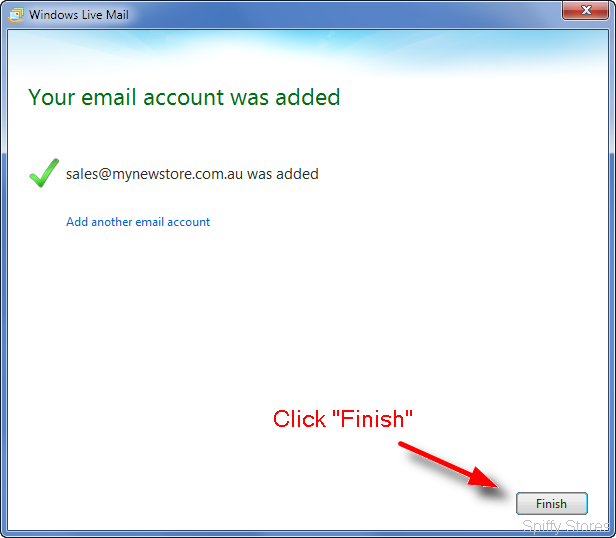
- On the setup confirmation page, click "Finish".
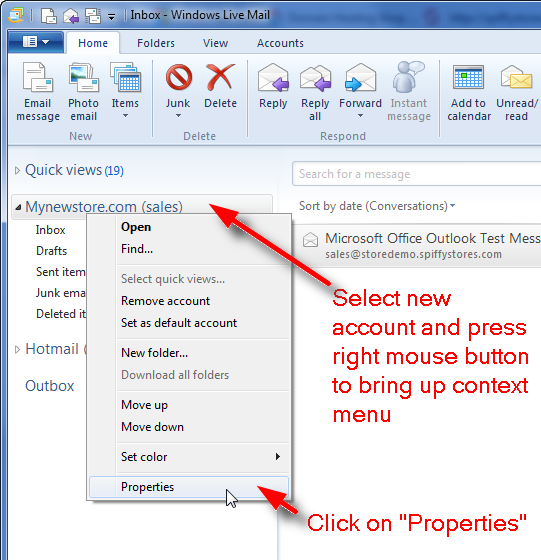
- On the "Home" page, select the account you just created and then click mouse button 2 to bring up the context menu, and then select "Properties".
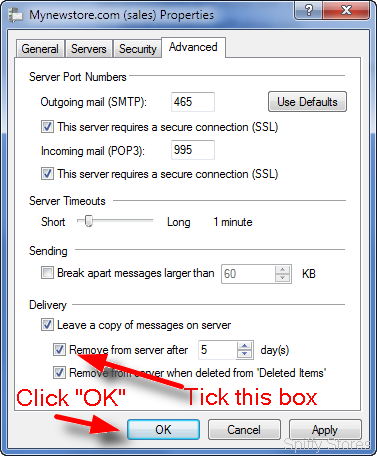
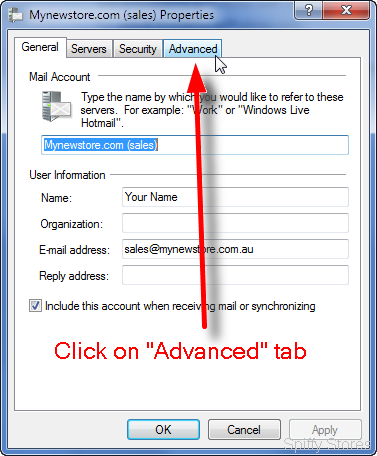
- Click on the "Advanced" tab.
- In the "Delivery" section,
- Your Windows Live Mail account is now set up.
- You may need to review your account settings if you want to customize the way Windows Live Mail handles your email. You can find more information about Windows Live Mail at http://support.microsoft.com/gp/email_problems_help.
