Difference between revisions of "The Melbourne ecommerce theme guide"
From Spiffy Stores Knowledge Base
| Line 27: | Line 27: | ||
*[[Melbourne ecommerce theme features|Melbourne theme features]] | *[[Melbourne ecommerce theme features|Melbourne theme features]] | ||
| + | *[[Melbourne ecommerce theme - Product page options|Product page options]] | ||
| + | *[[Melbourne ecommerce theme - Collection page options|Collection page options]] | ||
| + | *[[Melbourne ecommerce theme - Adding a wishlist page|Adding a wishlist page]] | ||
*[[Melbourne ecommerce theme FAQ|Frequently asked questions]] | *[[Melbourne ecommerce theme FAQ|Frequently asked questions]] | ||
*[[Melbourne ecommerce theme - uploading your logo|Uploading your logo]] | *[[Melbourne ecommerce theme - uploading your logo|Uploading your logo]] | ||
Revision as of 13:32, 27 February 2015
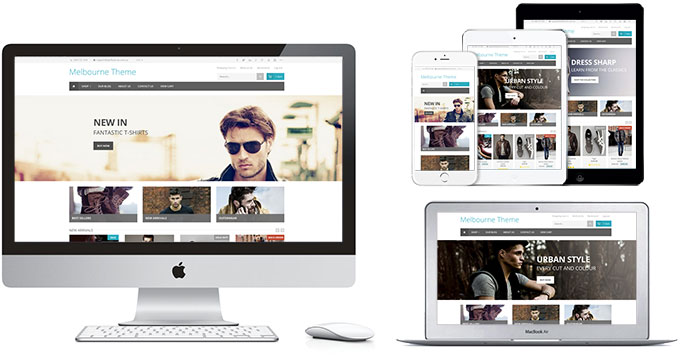
The Melbourne ecommerce theme is a responsive Spiffy Stores theme which dynamically adjusts for all screen sizes and devices. Your shop will look great… whether you’re on a desktop, laptop, tablet or a smart phone. Preview the theme, and resize your browser to see it in action!
The theme includes many new features including Yotpo product reviews, currency conversion, a customisable widescreen slideshow with captions and links, featured links, image galleries, Parallax banners, Facebook comments, wish lists, social media integration, blog excerpts and integration with Mad Mimi, MailChimp or Campaign Monitor.
Contents
Getting started - Before you start to customise your theme
1. Create your collections
You will find that it's difficult to customise your store and it's menus until you have created some collections for your products. Collections are a way to organise your products by grouping them into categories. You can base these categories on similar product criteria, prices, sizes, styles – it's up to you! You create your collections in the "Collections" section of your store's Toolbox.
You'll need to create at least one collection like "Best sellers", and add products to it for your products to show up on your home page.
Once you have created your collections, you will need to add them to your store's menus in the "Store menus" section of your Toolbox. If you don't do this, your collections will go unseen by customers visiting your store. By adding a link to your new collections in your store’s top menu, you’ll make the collection visible, and give your visitors easy access to all the great products you've added to it. Click here for instructions on how to edit your store's built-in drop-down menu.
3. Add a few products to your store
The next step is to get a few products set up in your store. Trying to modify an empty store means that you can't preview many of the features that are built in to the theme. Make sure you add your products to one of the collections that you have created. If you don't, they won't show up in your store.
Once you have completed these three main steps, you can then move on to setting up your theme.
Setting up your theme
- Melbourne theme features
- Product page options
- Collection page options
- Adding a wishlist page
- Frequently asked questions
- Uploading your logo
- Selecting & modifying your colour scheme
- Editing your store's menus
- Updating your home page
- Editing your slideshow
- Adding featured collections to your home page
- Adding featured collections on other pages
- Product image sizes
- Creating parallax banner images
- Connecting your email subscriber form
- Enabling Facebook comments
- Connecting to your social media accounts (Facebook, Twitter, Google + etc.)
- Setting up Yotpo reviews
- Displaying tabs on product pages
