Difference between revisions of "How do Themes work?"
From Spiffy Stores Knowledge Base
| (11 intermediate revisions by 2 users not shown) | |||
| Line 1: | Line 1: | ||
| − | Themes are | + | Themes are HTML pages that can include logic to display dynamic information. |
| − | + | A theme is used to tell the Spiffy Stores software what your online store should look like and what information should be shown to the customer. In other words, rather than creating separate pages for every individual product in your web store, a template lets you reuse the one page for every product by displaying the product data dynamically. | |
| − | |||
| − | |||
| − | + | A Spiffy Stores Theme can be fully customised using HTML, CSS stylesheets and JavaScript. A theme consists of a collection of files arranged into a number of subfolders or directories. | |
| − | + | The <code>templates</code> folder holds all the files that make up each of the different page layouts that make up your store. | |
| + | Another important folder is the <code>layout</code> folder, which contains the <code>theme.liquid</code> file. This file contains the main layout template for your store. | ||
| − | + | The <code>assets</code> folder holds all of the CSS stylesheets, JavaScript scripts, images and font files that are used in your theme. | |
| − | + | The <code>config</code> folder contains the theme settings file and configuration data that is used for building themes that can be configured and edited with the theme editor. | |
| − | + | Note that all of your template files have an extension of <code>.liquid</code>, but they are still just basically HTML files, so if you want to edit them using your favourite HTML editor, just rename them using an <code>.html</code> extension, and then change it back to <code>.liquid</code> before uploading your theme to your store. | |
| − | + | If you use Dreamweaver to build sites, [[Using_Dreamweaver_to_edit_your_store_theme|here are some instructions]] showing you how to modify Dreamweaver to edit <code>.liquid</code> files natively. | |
| − | + | === Applying themes === | |
| + | <gallery heights="200px" widths="200px" class="right"> | ||
| + | File:Theme overview 1.png|Design & Assets<br/>Upload/Download theme<br/>Upload & apply theme | ||
| + | </gallery> | ||
| − | + | When you upload a new theme, all of the existing theme pages and styles for your current theme are deleted and replaced by the new theme files. | |
| − | If your custom theme requires some additional files, you can upload them to your own server or | + | If you’ve already done some customisation to your theme, then you may want to back up the changes before loading a new theme. If you don't like the new theme, then you can just reload your saved theme. |
| + | |||
| + | <gallery heights="200px" widths="200px" class="right"> | ||
| + | File:Theme overview 2.png|Design & Assets<br/>Upload/Download theme<br/>Download your theme | ||
| + | </gallery> | ||
| + | |||
| + | To save your theme, use the "'''Download your theme'''" button in the "'''Design & Assets'''" section of the Toolbox to get a zip file of all your current theme’s assets. | ||
| + | |||
| + | === Restoring a saved theme === | ||
| + | |||
| + | If you want to restore a previously saved theme, simply upload the theme zip file using the "'''Upload & apply theme'''" button. | ||
| + | |||
| + | === Creating your own theme === | ||
| + | |||
| + | The default themes not cutting it for you? No problem. If you want to have a go at building a new theme for your store, you can download one of our standard themes from the Theme Gallery in your toolbox to get you started, or you can create your own theme from scratch using any popular website building application. | ||
| + | |||
| + | When you’ve finished creating and testing your new theme, create a zip file of the theme files, ensuring that you maintain the required folder names for the theme. You can have a look at one of the themes from the Gallery to see what the folder structure should be. Once the theme zip file has been created, upload it using the "'''Upload & apply theme'''" button. | ||
| + | |||
| + | === Additional images and assets === | ||
| + | |||
| + | If your custom theme requires some additional files, you can upload them to your own server or another third-party file hosting service and link to them from your store theme using the full URL address of the file. | ||
Latest revision as of 07:02, 6 November 2020
Themes are HTML pages that can include logic to display dynamic information.
A theme is used to tell the Spiffy Stores software what your online store should look like and what information should be shown to the customer. In other words, rather than creating separate pages for every individual product in your web store, a template lets you reuse the one page for every product by displaying the product data dynamically.
A Spiffy Stores Theme can be fully customised using HTML, CSS stylesheets and JavaScript. A theme consists of a collection of files arranged into a number of subfolders or directories.
The templates folder holds all the files that make up each of the different page layouts that make up your store.
Another important folder is the layout folder, which contains the theme.liquid file. This file contains the main layout template for your store.
The assets folder holds all of the CSS stylesheets, JavaScript scripts, images and font files that are used in your theme.
The config folder contains the theme settings file and configuration data that is used for building themes that can be configured and edited with the theme editor.
Note that all of your template files have an extension of .liquid, but they are still just basically HTML files, so if you want to edit them using your favourite HTML editor, just rename them using an .html extension, and then change it back to .liquid before uploading your theme to your store.
If you use Dreamweaver to build sites, here are some instructions showing you how to modify Dreamweaver to edit .liquid files natively.
Contents
Applying themes
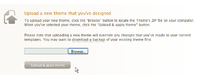
Design & Assets
Upload/Download theme
Upload & apply theme

When you upload a new theme, all of the existing theme pages and styles for your current theme are deleted and replaced by the new theme files.
If you’ve already done some customisation to your theme, then you may want to back up the changes before loading a new theme. If you don't like the new theme, then you can just reload your saved theme.
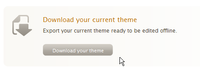
Design & Assets
Upload/Download theme
Download your theme

To save your theme, use the "Download your theme" button in the "Design & Assets" section of the Toolbox to get a zip file of all your current theme’s assets.
Restoring a saved theme
If you want to restore a previously saved theme, simply upload the theme zip file using the "Upload & apply theme" button.
Creating your own theme
The default themes not cutting it for you? No problem. If you want to have a go at building a new theme for your store, you can download one of our standard themes from the Theme Gallery in your toolbox to get you started, or you can create your own theme from scratch using any popular website building application.
When you’ve finished creating and testing your new theme, create a zip file of the theme files, ensuring that you maintain the required folder names for the theme. You can have a look at one of the themes from the Gallery to see what the folder structure should be. Once the theme zip file has been created, upload it using the "Upload & apply theme" button.
Additional images and assets
If your custom theme requires some additional files, you can upload them to your own server or another third-party file hosting service and link to them from your store theme using the full URL address of the file.